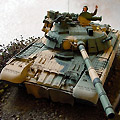
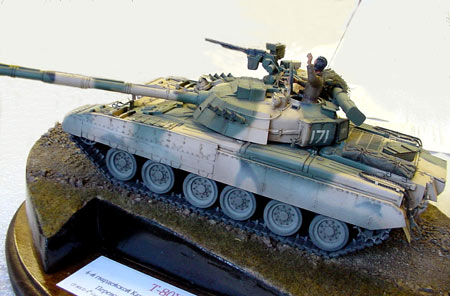
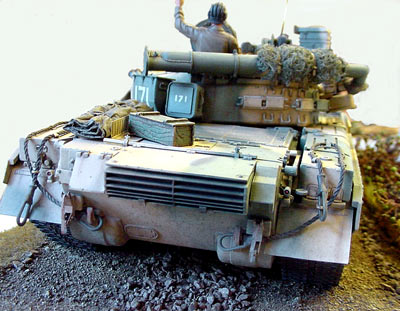
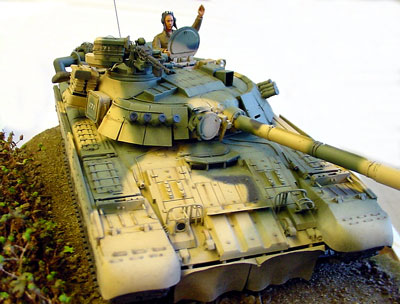
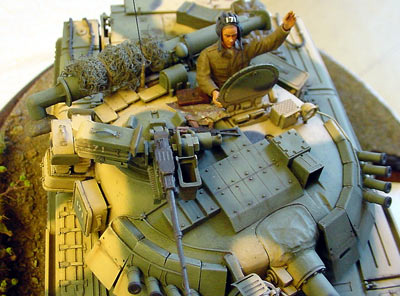
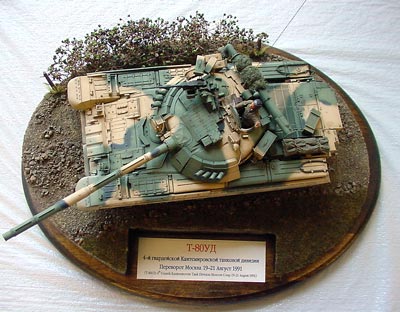
When this kit was originally released in the 90's (it has recently been re-released), it filled the void for many a modern Soviet armor fan.   The kit itself is not too bad, and it does build up into a decent rendition of a T-80UD which is diesel powered, however, it is not as the box denotes, a T-80U which is a gas-turbine unit.   Also since the 
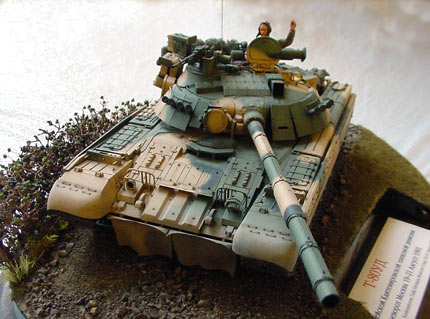
time of issue, much more information has come out about the T-80, and this has revealed 
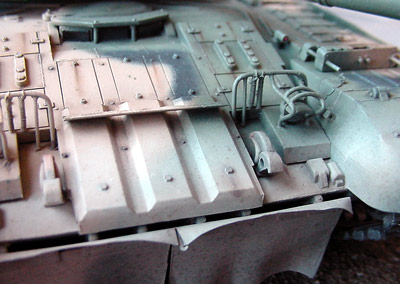
many mistakes within the kit.   The biggest issues are that the wheels are too large in diameter, the tracks are too wide by 2mm, and the upper run of track does not fit under the fenders.   The last issue is easily fixed, as the upper runs can't be seen on the 
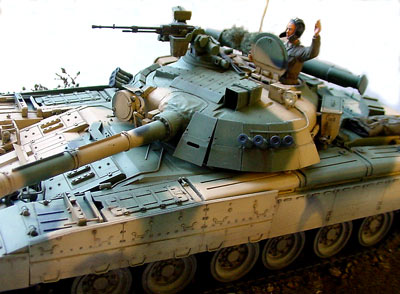
finished model, so they can just be left off.   Besides this, the gun barrel is too large and some of the details are rather soft, and there have also been questions regarding the accuracy of the overall dimensions.   With all of that said however, the kit does capture the lines of a T-80UD pretty well.


After picking this kit up at a model show, I proceeded to get a number of aftermarket parts for this Russian beast.   I ended up using the Eduard photo-etch set #35324, their 2A-46M 125mm barrel (#34002), and Modelpoint's tucha smoke dischargers, antenna mount and vehicle stowage sets.   I had also picked up a set of MR Modellbau's T-80 wheels, but didn't use them because half of them were warped.   I settled for the kit wheels.


I also learned they have a detail set for the T-80U, but I didn't end up getting it.   At the time, I did not know of SP Designs T-80 track w/drive sprocket set, or their wheel set.   I have since picked up a few for future T-80 projects and can't wait to use them.   The rest of the detail for the project, I scratch built out of styrene, brass wire, and lead foil.


THE HULL:   I began by building the basic hull, with no details.   Then, starting with the rear, the plastic underneath the deck screens was cut out and boxed in to give depth, the rear exhaust was fixed, and all the Eduard photo etch goodies were installed, along with additional wire leads to the running lights.   I also replaced the kit tow cables with new ones made from string.


On the front and top, I again added the Eduard P.E.   This is really a must, as it adds much more detail to the tank.   The main disappointment on the front of the tank was the kit supplied light guards.   They were very poor renditions of the real thing.   I created new ones out of brass wire.   This was rather tricky as there were a number of pieces and bends, and they all had to line up.   I also replaced the front dust skirts with ones made from lead foil, and the side skirts where further enhanced with new wire grab handles at the bottom.   Only a few storage items were added, (camo netting, rolled tarp and box), as the pictures I have during this time period show no storage.


THE TURRET:   This is where a majority of the super detailing took place.   I replaced the kit gun with one from Eduard, which in itself is a little model.   Additionally, I had to modify the gun mantlet so this new barrel would fit, and at the same time I applied bolt detail to it.   I added a cast texture to the turret surface using Testor's liquid cement and stippling with a brush.   The Kontact-5 ERA on the front was enhanced with more P.E., as were all the stowage boxes, and the tucha smoke discharger mounts were scratch built to hold the Modelpoint dischargers.   As mentioned earlier, the antenna mount was replaced with the Modelpoint item, and I also added a MV lens in the searchlight.


All the wiring and piping was added, per my references, and on the rear of the turret, all the tie downs were replaced with brass wire and the two replacement tracks and mounts were scratch built using the kit links as a starting point.   Canvas covers were added to the snorkel tube end and the ammo boxes with Mr. Surfacer 1000.   Both commander and gunner's hatches were detailed with bolt detail and new grab handles.   The NSVT machine gun supplied in the kit, lacked detail, so it was replaced with one from the Tamiya T-72 kit.   The mount for the NVST is also all wrong.   I had to scratch build a new one out of styrene and brass.


As I have said before, I used the kit tracks and wheels, despite their faults.   I did run into some problems when assembling the tracks onto the sprockets.   The sprockets were too narrow, and I ended up inserting some shims to widen them so they would fit the track.   The tracks are also the length and link kind, which I really don't like, but they turned out OK.


PAINTING / WEATHERING:   Since there were a number of different materials used in this build, I started by giving it a primer coat of flat black.   I then used my references and drew out the camouflage pattern on Xeroxed copies of T-80UD plans I have.   These tanks sported the typical 3 color Soviet scheme of the late 80's, early 90's.   I started with the tan, then the green and finally with the black crow's feet, I don't remember which brands or colors I used.   I then airbrushed the numbers with homemade stencils in white.   I used my Paasche double action airbrush for everything.   After giving it a shot of clear flat, I applied a few filters of orange and dk. green.   I used local pin washes to bring out all the detail, and then delicate dry brushing to highlight it.   I added scratches and chips to the tan with green and to the green with black.   I also used a pencil to highlight edges and handles and produce a metallic sheen.   The lower hull was misted with a dusty tan, and Mig's pigments were used on the tracks, wheels and lower hull.


THE FIGURE:   The gunner was made from a variety of parts from ICM Soviet tanker figures, and the head is a Hornet Item.   The flesh is painted in oil, and the uniform is base coated in acrylic with oils used for the highlights and shadows.


THE BASE:   I like to display my models on a base with some type of terrain.   The groundwork is made out of styrofoam covered in spackle, with various static grass and rocks glued on.   The bushes were made from dried flowers with foliage sprinkled on.   The barbed wire fence was scratch built, using scale barbed wire made by twisting fine wire, and it actually wasn't that hard to do.   I made sure that the road matched the same dusty color I had used on the tank, and bolted the tank on to the base.


Overall I am very pleased with my effort in depicting a T-80UD.   The kit has some problems, but with decent references and time, a good product can be made.   I had fun building this model.   I tried some new techniques, which challenged my abilities, and it made me a better modeler.


REFERENCES:   T-64 and T-80, Steven J. Zaloga, Concord Publications #1031


[Index]