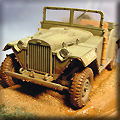
![[The Tamiya 1/48th scale GAZ-67B.]](EF-Gaz-083b.jpg) |
I was looking for a way to start modeling armor, but I was intimidated
by tanks with all the bits and pieces not to mention the tracks. Tanks also posed a
problem to me in that I had no idea what the different parts of the tank were called.
It took a long time of reading model magazines to understand what was what. All I know
is that I wanted to build military vehicles due to the many great articles I had read.
I gravitated toward soft skinned military vehicles due to my background with automobiles.
It's got wheels, not tracks; I should be able to handle this. Even though these subjects
have wheels, I was also interested in the unique designs of many of these vehicles.
Besides being inspired by my model club members, I was hooked by an article written by Luciano
Rodriquez in Military In Scale Magazine (April 2008). Luciano explained his methods in a
manner that seemed obtainable. After reading his article about 10 times, I went out and
purchased the 1/48th scale Tamiya GAZ-67B kit.
The kit consists of one tree of olive green parts along with clear parts for the windshield/frame
and headlights. Furthermore, Tamiya has supplied a seated driver figure and a decal sheet
for a couple of different versions. I was impressed with the overall detail of the kit
parts. However, the driver's pose was a bit strange looking so I decided not to use him.
|
|
![[The boxart.]](GAZ-box2.jpg) |
|
 |
The GAZ-67B was a four-wheel drive Soviet military vehicle built by Gorkovsky Avtomobilny Zavod
starting in 1943. By the end of the war, it was the soviet equivalent of America's Willy's
Jeep. It was powered by a 54 hp version of GAZ M1 4-cylinder 3280 cc gasoline motor, and
had a top speed of 56 mph.
This all came about due to an agreement signed by the Soviet Union with the Ford Motor Company in
May of 1929. The Soviet Union agreed to purchase $13 million worth of automobiles and parts
from Ford, and Ford would then supply technical assistance in the construction of an
automobile/manufactoring plant until 1938. Start of production was on January 1, 1932 at the
GAZ plant which also displayed the Ford logo.
During the process of getting the GAZ plant up and running, many American engineers and skilled auto
workers re-located to the Soviet Union. Even after the plant was commissioned in 1932,
hundreds of American workers, many with their families stayed there, however they required to surrender
their American passports. Unfortunately, within a few years, they became victims of Stalin's
"Great Terror" in which they were either shot or sent to Soviet gulags. Many appealed to the
American embassy for help, but their voices were largely ignored.
|
|
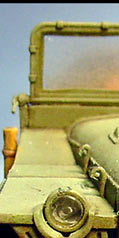
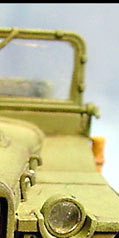
Assembly: The kit has a fairly low part count which made the build up go
quickly. It goes together almost flawlessly other than having to fill some ejector pin
marks. I have come to find that Tamiya 1/48th soft skinned vehicles are riddled with many pin
marks.
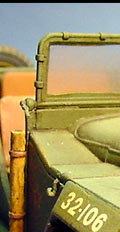
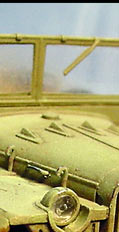
In Luciano's article, he added some small details without going into super detail mode. He
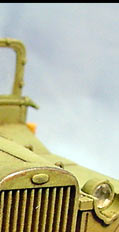
mentioned that the headlights looked too small and made new ones, which also required new lenses.
I decided not to go this route and stayed with the kits parts. I'm sure he is right, but I
just could not tell from the pictures I saw. Luciano also added engine hood handles and latches,
latches on both sides of the fenders, a guide plate for the starting crank, two small handles for
windshield locking nuts, and a windshield wiper. After studying his materials and methods, I
went to work on adding the details, some of which I did my way, and others following Luciano's
directions. I added a handle on each side of the hood using fine gauge wire. At this
point, I took more fine wire and put a hook at one end and installed two of them on each side of the
hood. This was my method of creating the engine hood hold down latches. I employed the
same basic method to create the fender latches. To make the startingcrank bracket, I took some
plastic card stock and cut out a rectangular section about 5 to 7 mm in length. Using my punch
set, I inserted a small hole about 3 mm down and center from the top. Then I rounded the top
with a sanding stick into a semi circle. To complete the bracket, I bent the bottom section of
the piece perpendicular to the top and glued it to the model. The next items to create were the
handles for the windshield locking nuts. I stretched some sprue, and cut two 2 to 3 mm sections, and
attached them with superglue. I'll suggest cutting more than 2 so that you will have spares when
they get broken off like mine. In fact, I had to fabricate another one when it broke off, soon
after I was finished. The last scratch built item was the windshield wiper. For this, I
stretched two pieces of sprue and glued them in a fashion that resembled the wiper arm and blade.
|
|
![[Index]](../../../Redstar3a.jpg)


![[I brush painted the seat covers Dark Earth, the steering wheel with Floquil Weathered Black enamel and the side tarps Desert Yellow.]](EF-Gaz-086a.jpg)
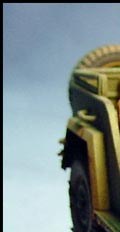
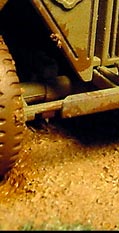
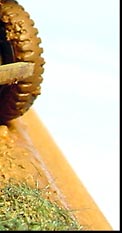
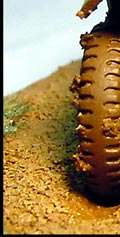
![[I dry brushed the raised wheel hub details with Testors Pale Green enamel.]](EF-Gaz-080a.jpg)
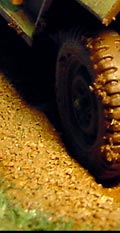
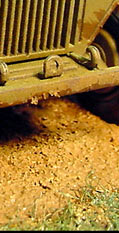
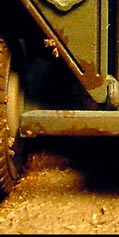
![[I sprayed thinned Tamiya Desert Yellow along the bottom edges of the model for a faded and dusty look.]](EF-Gaz-088a.jpg)
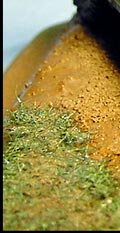
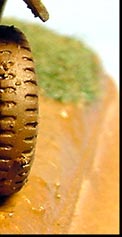
![[Epoxy putty was laid out and sprinkled with some model railroad ballast and static grass to create the ground work.]](EF-Gaz-076a.jpg)